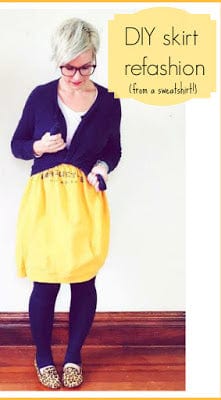
I'm going to show you how to easily make a skirt that is comfy and loung-y from a man's sweatshirt. Ready?
Supplies:
*L or XL sweatshirt
*enough elastic for waist 3/4" wide
*sewing machine (no special needle or foot needed)
This sweatshirt here is a size L, if you can find XL that's even better - you might not have to add the sleeve for width like I did here if it's big enough. The Goodwill has an amazing selection of sweatshirts, I've picked out a few more for future upcycles.
OK, lay it out flat and smooth all wrinkles out. Grab some scissors and let's do this. No regrets!

1. Cut off hood, sleeves, and make the sides straight like below. See the right side? I haven't cut it yet, where on the left I have.

Now it's trimmed off.

2. You will have 2 pieces of skirt body now.
Place body pieces right sides together and sew along ONE side to join. Press seam flat.
If you want to, you can serge- but it's not needed as knit fabric doesn't fray. Set aside for now.
3. Cut open one sleeve along the seam line and lay flat.

4. Sew the sleeve to one side of the skirt body (front) matching the cuffs at the bottom so they look even.

5. Repeat to sew the remaining open side of sleeve to the other side of skirt body. Now the skirt is a tube.
*Be sure to match those cuffs at the hemline, it's noticeable.
If the top is not a straight line (mine isn't) trim now so it is.

6. Fold the top of the skirt down an inch and sew around the entire skirt, leaving an opening of six to eight inches. This is the casing.
7. Cut a piece of elastic to your waist measurement minus one inch. Insert a safety pin on each end (the 2nd one is so you don't lose it)-- and insert elastic into casing. Take it all the way around and then stitch elastic ends together. Distribute the gathers evenly around skirt.
****Before you zig zag stitch those ends together try it on.****

*I like this elastic the best- I buy it in bulk on Amazon, but it's very stretchy so I have to minus 2 inches from my waist measurement.

8. Sew the casing closed after you try on to make sure it fits, and voila! A new skirt and it cost you (hopefully) next to nothing.

If you don't like the kangaroo pocket unpick the stitches and take it off. It's easier than you think.
You can see my kid version here from years ago. The shorter length put the pockets in the perfect position. Play with placement and length to find your perfect fit. This tutorial is meant as a jumping off point for you. I hope you have fun! :D
Tag me if you make one so I can send you virtual hugs!